Showing posts with label Curtain Walls and Systems. Show all posts

Monday, November 24, 2008

Basic Walls as Curtain Wall Panels

I have mentioned previously you can use Basic Walls as a Curtain Panel. This adds another depth to modular wall construction. What I didn’t know was that when you use a basic wall in a curtain wall on curved walls, it follows the curve and doesn’t facet as other curtain panels do. This could be very handy.
To add to this. a basic walls have the same capabilities as system panels (in curtain wall not curtain systems), i.e. they can follow any shape.
In the element properties of the basic wall panel you can also chose if it schedules as a panel or wall.
Finally there is a small bug in non-rectangular panels in regard to their location line placement. Typically you can select a basic wall panel and select if it is Exterior or Interior placed.
On non-rectangular basic wall panels sometimes it won’t allow you to place the basic wall panel Interior or Exterior. You will get the following message:

Tuesday, November 11, 2008

Right click window on Curtain Walls

Sometimes it’s amazing what you find when you select an element and then use the right click function. Curtain walls or curtain systems is one such situation where you will really wish you knew this six months ago.

Select a curtain wall and right click on your mouse.

You will notice there are some very handy selection tools for the Curtain panels and Mullions.
Now select a curtain panel and use the right click function.

I’m also sure you saw the “Select Grid” function. For the life of me, I cannot see how this selection works. No matter what Revit release I use, or what kind of Curtain System or wall I select, it is grayed out. All I can guess is it was intended to be a function, and programmer X from Autodesk forgot to put the coding in.

Anyway what works from above will be very helpful.

Monday, November 10, 2008

Curtain System Panels. Part 2:

Following on with System panels, I never knew you can edit a curtain system panel family just like an in-place family. Select a system panel, and you will get the “Edit” button in the options bar.
Thus you can add, subtract or create any shape with-in the system panel. This obviously only affects this panel instance but it could be a fix for that one or two non-rectangular panels with in a bigger system.
This image is a simple shop front curtain wall, with the wall profiled. I have edited this instance panel to have circular holes in it.

Note: A limitation to this method is you will not be able to call it up in a legend view.

Saturday, November 8, 2008

Curtain System Panels. Part 1:

Curtain Wall System Panels are an out of the box template panel for Revits Curtain walls or Curtain Systems. They should not be confused with Curtain Panel .rfa files, as thought they are ideally intended to act like regular curtain panels sometimes they do better and sometimes not so good.

Currently Revit does not allow you to insert a Curtain Panel .rfa file into a non-rectangular shape; so in that situation, you have to use a Curtain System Panel. This is one area they are better. On the are not so good side, and I can only put this down to a bug is the following:
From the out of the box Revit Template, create a shopfront curtain wall. Select one of the glass panels and change it to a door panel. Now flip the door from right to left (edited 13-11-08 after post for clarification), using one of the flip options.

Now change the door back to the System glazed panel.

Notice how the panel is on the wrong side (i.e. not the same side as the other system glazed panels). As it’s a system panel it does not have the flip option. Unless someone can tell me otherwise the only way to fix this is to change it back to the door, then flip it to the doors home position, and then change the door to the system glazed panel.

This problem appears to be in Revit 2008 and 2009 to curtent RAC 2009 - 20080915_2100 (WU2).

Some other information on System Panels in my next post.

Tuesday, October 28, 2008

Video Tutorials on DesignRefrom


There are some really great video tutorials on DesignRefrom (http://designreform.net/) on creating some quite interesting families. Make sure you sign up the the email subscription list to find out about the new videos as they come out. Look at the videos here.
Well done guys. There are some great tips on there.

Tuesday, September 16, 2008

Making curtain systems work for you.

We have a very large office building, which has now been designed to have raking walls, with shaped panels between windows from floor to floor. All the walls will have a slight rake so the detail needs to be able to turn around the corner. The other thing is the cladding panels will be various colours. Some of these colours are specials, so we need to be able to schedule the panels to make sure we have enough area to justify the special colour fabrication.

Because of a panelised system, using Curtain System seems a sensible approach. As the system is more on the complicated side of things, a mock-up is an essential part of ensure the system will work, especially with the scale of the job.

My first mock up looked like this.

The obvious issue that has come up is that Curtain panels don’t wrap very well around corners. However mullions wrap very well around corners.

So in my development I ended up going away from the conventional the resultant shaped panels are actually Mullions with a specified profile. Mullions can act exactly like panels. We can schedule them and know they will view correctly in plan, section and elevation. The actual Revit panels have just be switched for empty panels. The glazing below is standard glazed curtain panels.

This is a direct example about how doing mock-up studies will greatly assist in the long run.

Sunday, July 13, 2008

Creating a Curtain System by Sloped Glazing

This is one of Revit’s little secrets. I’ve no idea why this is hidden in the system, but it’s a great little tool.

Start off by drawing a standard roof using roof by footprint method. After you have completed the roof shape you want, finish the sketch.

Now select the roof. Go to the "type selector" and scroll down to “Sloped Glazing”.


You can now add grids and mullions as with any standard curtain systems.

If you need to edit the shape or slope, you can select the curtain system and edit it like a roof.

None Rectangular Curtain Panel note:

It should be noted that in any "none rectangular curtain panel" in a curtain wall or curtain system; you can only use System Panels. Revit won’t allow you to use Curtain panel.rfa family files. However there is quite a lot of customisation with a system file, i.e. with material, location and thickness. If you panel is rectangular, then of course you can use a customised curtain panel.

Wednesday, July 9, 2008

Curtain walls within a curtain wall.

Ok, this is not a special trick. As mentioned in one of my previous posts, with a curtain wall, you can select a panel and using the “Type Selector” and change it to a curtain wall. The above image is an example of this and it would be useful in the event you want some of the mullions to go in a different orientation to the main grid.

I would say before you even do anything like this, make sure your other project team members are aware of how you are doing it. For someone to try to edit this with-out understanding it will result in a lot of frustration and swearing.

Monday, July 7, 2008

Curtain Systems - by Lines

Lets stick with Curtain Systems for a litte bit.
Creating Curtian Systems by lines is not the most common way I make curtain systems, but they can be very usefull and work very well as long as you are aware of their limitations.

Lets start by creating some model lines on two different planes (eg level 1 and level 2)
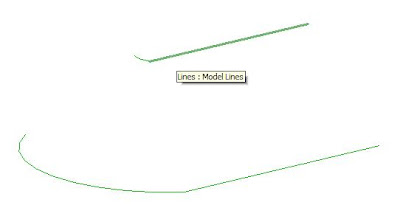
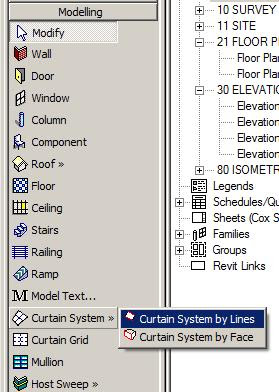
Now go to Modeling and Curtain System >>Curtain System by Lines
Click on one of the bottom model lines and then the opposite top model line and then click to a side blank area. Your first Curtain System will be created. Notice how it start off with only one panel.
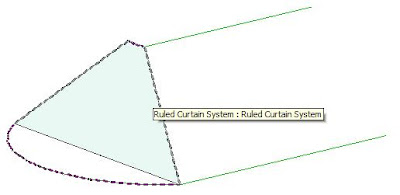
Repeat the same on the remaining model lines. I then went to a plan view. In the modeling design bar select Curtain Grid. Hover the courser near the lower model line and Revit will suggest a location for a vertical curtain grid. Left click to insert the grid.
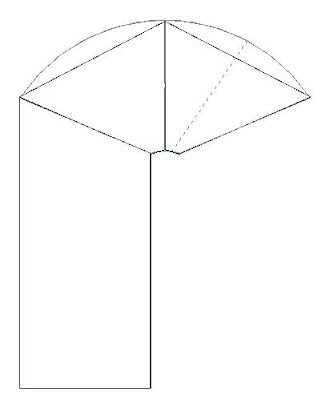
Work your way around to insert Curtain Grids on the rest of the system.
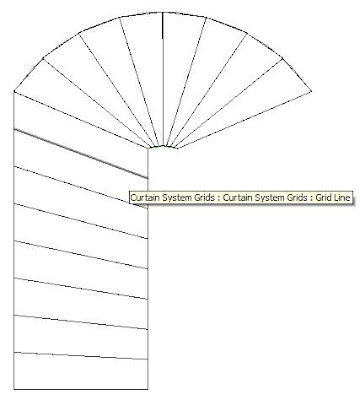
Notice how the Curtain Grids along the straight glazing are not parallel , but from a fan shape.
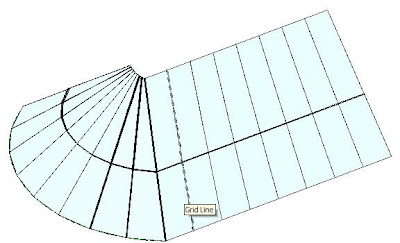
Below is the same Curtain System using create by face. See how the grid is parallel.
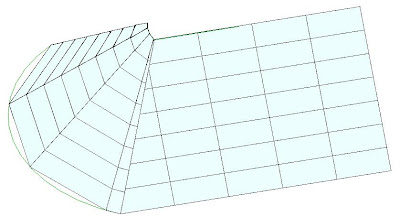
Continue the creation of the glazing and add Mullions.
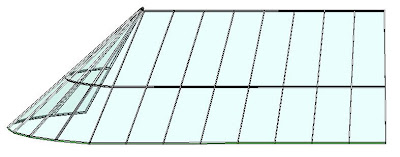
So it's relatively simple. OK, now lets edit the shape. Select one of the original Madel lines and drag its end. The Curtain System will automatically update dynamically.
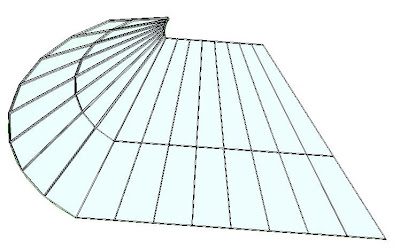
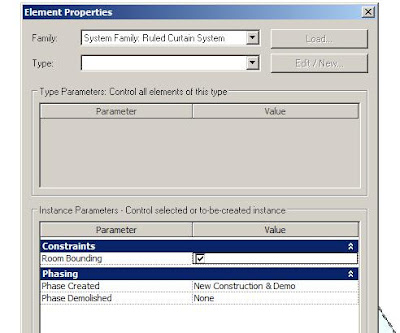
So I'm sure you can think of a few good uses for this method of drawing. This from of system in Revit is called a "Ruled Curtain System". You will notice how it doesn't have the same properties dialog box that a Curtain Wall by face has. In fact it has very few properties you can change. This is one of the big limitations of Curtain Systems by lines.
Finally the last thing I will say today on Curtain Systems is in regard to Tagging them. I forgot to mention in yesterdays post "Curtain Wall and Curtain Systems" that you can not use the "Tag" function on Curtain Systems. Tagging works perfectly on Curtain Walls. The image below shows all the categories you can create tags for, but Curtain Systems are not present.
This leads on to issues with putting window number tags on Curtain Systems. You can't directly. You end up having to use the Curtain Panels for Tagging purposes. This can obviously lead to some problems so care is always necessary.

Sunday, July 6, 2008

Curtain Wall and Curtain Systems.

I often get the question, “What are the differences between and Curtain Wall and Curtain System?”

The answer is, they are generally very similar, and each has its advantages and disadvantages in different circumstances. Both can contain panels, curtain grids, and mullions. Generally Curtain Systems are used for more complex non vertical shapes and are created using faces or model lines. My general recommendation is, if you are trying to create a gridded element that is 90 degrees to the Horizontal use a Curtain Wall, which is a sub-category of the Wall System Family.

Some benefits of Curtain Walls.

  • Curtain wall behave like basic walls. They are line based; you can trim them in plan, flip them between inside face and outside face, right click on their ends and drag their location, profile the shape in elevation, attach the top of bottom to floors and roofs and even convert them to other types of basic or stacked walls in your library.
  • Panels with-in curtain walls have the extra advantage that they can create a curtain wall with-in themselves, as wall as apply a basic wall type as a panel.
  • Curtain walls can be created using “Wall by Face” and still edited in plan using the drag end.

A curtain wall with basic wall panels and windows inserted.


Curtain Systems.

  • Curtain Systems are their own system family and can be created only in the following ways.
    • By Face
    • By Selecting 2 model lines or edges
    • By converting a basic roof to a curtain system.
  • When a curtain system in created by a particular method, it can only be edit using that same method (i.e. by face by changing the shape of the face).
    Tip; never delete the mass or lines you have created the curtain system from, as you will be unable edit the curtain system.
  • Curtain Systems can not be profiled, can not be flipped between inside and outside, they do not contain blue dot drag ends, and can not be attached to roofs or floors.
  • Curtain wall panels can not be changed to basic wall or curtain walls.
  • Curtain Systems can however be off the vertical axis, dome or room glazed element.

A curtain system roof dome.


Because Curtain Walls are easier to edit, if you can use them, do so.